Do You Need a Permit to Rebuild a Deck in Marietta, GA?
What the City of Marietta requires to rebuild a deck (permit, fees, three inspections and a real timeline), from a rebuild we permitted and built in summer 2026.
By Jadon Steavens, Character Craftsmen — Marietta deck builder
Short answer: yes. If you tear down an old deck and build a new one inside the City of Marietta, you need a building permit from the City of Marietta Development Services office, and the deck will be inspected at least three times before it is signed off.
That's the easy part. What nobody tells you is what the process actually feels like from the homeowner's side: how a deck gets planned before a shovel ever touches dirt, what gets found once demolition starts, how long approval takes, why a job can sit for weeks after the permit is issued, and what you should expect your contractor to do about all of it.
This article walks through a real deck rebuild we completed in Marietta during the summer of 2026 — from pre-construction planning through footing excavation, unforeseen site conditions, a change order for rotten framing, a stalled inspection, and final sign-off. Here's what actually happened, and what to expect if you're about to do the same thing.
FIRST, THE BASICS: PERMITS FOR DECKS IN THE CITY OF MARIETTA
Marietta is its own permitting jurisdiction. If your address is inside the city limits, your permit comes from the City of Marietta, not Cobb County. Plenty of Marietta mailing addresses are actually in unincorporated Cobb, so the first thing we do on any deck estimate is confirm which office you belong to. Cobb County has an address lookup for exactly this question.
For the City of Marietta:
- Who issues it: City of Marietta Development Services, Permits and Inspections division.
- How it is filed: Online through the SagesGov portal. Plans, site plan, and contractor information all upload there, and inspections are scheduled through the same system. Link: https://www.sagesgov.com/marietta-ga
- What it costs: Residential permits are priced on construction value. As of this writing the fee is a $50 base plus $5 per $1,000 of total construction cost, with no separate plan review fee for residential work. On a $20,000 deck that is roughly $150. Confirm current numbers on the city's fee schedule before you budget.
- Re-inspection fees: The first inspection of each type is free. If you fail and need a re-inspection, the city charges a fee that steps up with each failed attempt. This matters, and we'll come back to it.
- Turnaround on inspections: Requests made by 4:00 PM are generally scheduled for the next business day.
What does the permit cover? A deck permit in Marietta is a structural permit. The reviewer is checking that what you are proposing will hold the weight it needs to hold and will not pull off the house. That means the application needs a site plan, a framing plan, ledger detail, and stair and guardrail details — covered in full below under Permits and Design Documentation.
If you are hiring a contractor, they should prepare and submit all of this. If your contractor asks you to pull the permit as a homeowner, that is a warning sign, not a favor.
PRE-CONSTRUCTION: PLANNING BEFORE THE FIRST SHOVEL
Before any demolition or digging starts, a permitted deck rebuild runs through a planning phase that most homeowners never see. On this project, that phase is what made the surprises later — a hidden sprinkler line, rotten framing behind the old ledger — manageable instead of derailing.
Good planning up front does three things: it gets the permit approved faster, it prices the job accurately, and it gives the crew a clear reference to build against once material is on the ground.
Survey
Before a framing plan can be drawn, we need to know exactly where the property lines, easements, and existing structures sit. A site survey (or an existing plat, if the lot hasn't changed) confirms setback distances and keeps the new deck's footprint clearly inside what the city and any HOA will allow.
Link to order survey: https://www.mysiteplan.com/
Renderings and structural drawings
A rendering gives the homeowner something to react to before a single board is cut — dimensions, sightlines, how the new deck relates to the house and yard. Alongside it, the framing plan, ledger detail, and structural drawings are what the city actually reviews for the permit. Together, these documents make "what are we actually building" unambiguous between the homeowner, the crew, and the city reviewer — and reviewing them internally before submittal, and again before the framing inspection, is how we catch span or sizing questions before an inspector does.
Detailed scope of work
A written scope of work spells out what is included — demolition, footing count and size, framing, decking material, railing style, stairs — and what is not. This is the document that pricing, change orders, and the final walkthrough all get measured against. Without it, "rotten wood we found during demo" has no baseline to be compared to.
THE REAL TIMELINE: APRIL TO JULY
The homeowners had an aging attached deck. Rotting boards, soft spots, the usual. They wanted it rebuilt the right way and they wanted it permitted.
Here is what actually happened, pulled from our project records and our text history with the clients.
Late April: the estimate, and a smart request
We sent a written estimate for a full tear-out and rebuild. Before signing, the homeowners asked to see one of our decks in person. We met them at an active jobsite in Powder Springs the next afternoon so they could look at framing, hardware, and finish quality on a live project.
Takeaway for homeowners: Ask for this. A contractor who builds permitted decks will have a job you can walk. A contractor who cannot show you one is telling you something.
Early June: permit package submitted
We assembled the permit package — site plan, framing drawings, and the application details — and filed it with the City of Marietta.
During the same stretch, the homeowners took care of a few prep items on their side. The old deck had a gas line running to it for a grill, and an irrigation head sat where a new footing needed to go. They had the gas line cut and capped by their plumber and had the sprinkler relocated. Meanwhile one of our crew leads came out to evaluate the band board (the rim of the house where the old ledger had been attached) for rot before demolition.
Takeaway: Two things surface on almost every rebuild. First, utilities. Gas, irrigation, low-voltage lighting, and downspouts all tend to be tangled up with an old deck, and they have to be dealt with before footings go in. Second, hidden rot at the ledger. If the old deck was not flashed properly, the band board behind it is often damaged, and that repair happens before the new ledger goes on. A good contractor looks for it early instead of discovering it on demo day.
June 11: permit approved
About ten days after submittal, the City of Marietta approved the permit. That is a reasonable expectation for a straightforward residential deck when the drawings are complete.
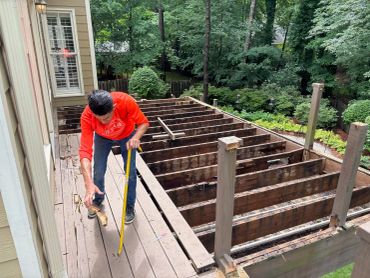
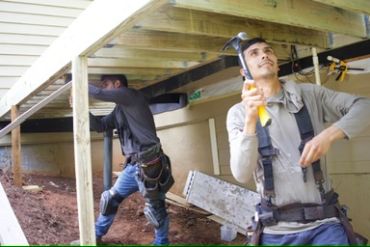
Late June: demolition and footing excavation
With the permit in hand, demolition began, followed by footing excavation.
Footing excavation looks simple from the outside — dig a hole, pour concrete — but it's one of the phases where careful layout matters most, because everything built on top of the deck depends on it being right the first time.
Before digging starts, the crew lays out the footing locations against the approved framing plan: post spacing, beam lines, and distance from the house all have to match what the city reviewed. Depth matters too — footings in Georgia need to reach below the frost line and bear on undisturbed soil, not fill dirt or old debris from the previous structure. And site conditions factor in at every hole: slope, existing landscaping, irrigation and utility lines, and how close the excavation runs to the foundation or a property line.
This is also the point in the project where underground surprises tend to surface, which is exactly what happened here.
Unforeseen site condition: an irrigation line in the footing path
Sprinkler lines, low-voltage lighting wire, and even fiber-optic cable are common finds once excavation starts on an older property, especially where a deck has sat in place for years and landscaping has grown up around and under it. On this job, the sprinkler head near one of the new footing locations had already been flagged and relocated during pre-construction — which is the outcome you want. Catching a utility conflict during planning, before the hole is dug, avoids a mid-excavation stop.
Not every condition can be caught in advance. Drainage patterns, in particular, often only reveal themselves once the old structure and any surface material around it are removed — standing water, poor grading, or a downspout that was quietly routed under the old deck for years. When a condition like this turns up mid-excavation, the sequence has to adapt: the crew addresses the drainage or utility issue first, sometimes adjusting a footing location slightly within what the approved plan allows, before concrete goes in. Any adjustment that changes footing count, size, or location gets confirmed against the framing plan before proceeding.
Takeaway for homeowners: Ask your contractor what happens if they hit something unexpected underground. The right answer involves stopping, assessing, and confirming the fix against the plan — not working around it and hoping it doesn't matter later.
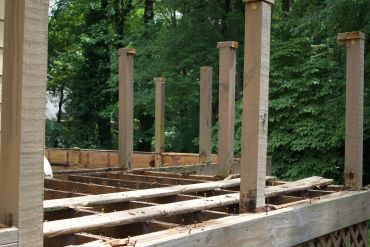
Footing inspection followed excavation. Before any concrete is poured, the city inspects the holes: depth, diameter, and location against the plan. Ours passed. Concrete went in, posts were set, and framing began.
This is where the process shows its shape. A Marietta deck is inspected in sequence:
1 Footing inspection — open holes, before concrete
2 Framing inspection — posts, beams, joists, ledger flashing and bolts, hangers, before decking covers it
3 Final inspection — stairs, guardrails, everything finished
Each one is a gate. You cannot skip ahead, and if one fails, everything behind it waits.
Change order: rotten wood discovered behind the band board
During construction, once the old ledger and surrounding material were removed and the crew was into the framing work, rot was discovered in the wood behind the house band board — the structural wood the new ledger needed to attach to. This is a genuine unforeseen circumstance: an estimator or contractor cannot see behind the band board at the time of the estimate or contract signing. A visual check before demolition can flag surface-level concerns, but the true condition of the wood behind it is only confirmed once it's exposed during construction.
When that happens, the right process is a change order, not a verbal "we'll just handle it":
- The rot is documented — photos, location, and extent of the damage.
- The homeowner is notified before any extra work proceeds, not after the fact.
- A change order is written describing the additional material and labor required, with a price, and reviewed against the original scope of work.
- Work on the affected area pauses until the homeowner approves the change order.
- Once approved, the repair is completed and the project continues on schedule.
Takeaway for homeowners: Hidden rot behind the band board is a normal, common finding on an older deck rebuild — not a sign something went wrong or was missed. What matters is whether your contractor treats it as a documented, approved change or as an unexplained line item on the final invoice. Ask upfront how change orders will be communicated and approved on your job.
June 30: the framing inspection stalls
The framing inspector came out, looked at the structure, and questioned the structural math on the submitted plans. Specifically, whether the joist span and beam sizing shown on the drawings were adequate for the layout as built. He did not fail the deck outright, but he would not pass it either. The plans had to go back for review.
Our project management notes from that day read: "Postponed until plans have been approved and inspection is passed."
The homeowners' reaction was completely fair. They asked whether we could get a second opinion. They wondered whether the inspector was inexperienced. A few days later one of them left a voicemail that summed it up: it had been about a month, and they were still waiting for something, and they were not sure what.
That is the part of the process nobody warns you about. You have an approved permit. The footings passed. The frame is up. And then a plan review question stops everything for days that turn into weeks.
What was actually happening: The city's job is to verify that the deck as built matches the plans as approved, and that the plans themselves are structurally sound. When an inspector sees something in the field that does not line up cleanly with the span tables, he is not being difficult. He is doing the one thing the permit exists to do. The correct response from a contractor is to resolve the math on paper (revised drawings, an engineer's letter, or a field change that brings the structure inside the prescriptive tables) and request a re-inspection, and to keep the homeowner informed every step of the way. On this job the fix was on paper, not in the framing, but the wait was real.
July 9: re-inspection
Revised plans went back to the city, and a re-inspection was scheduled. The homeowners asked that I personally be on site for it, which was the right call. When there is a structural question, the person who designed the framing should be standing next to the inspector answering it.
July 14: passed
The framing passed. It was a different inspector this time. The homeowner's text that morning: they'd passed, the inspector had been by that morning, and he'd complimented the work.
And a few hours later, unprompted, the line that made me want to write this article: "There are pros and cons to permits."
She was right. The con is the time. The pro is that a city inspector had now put eyes on every footing, every beam, every bolt, and every hanger on that deck and signed his name to it.
July 15: final inspection
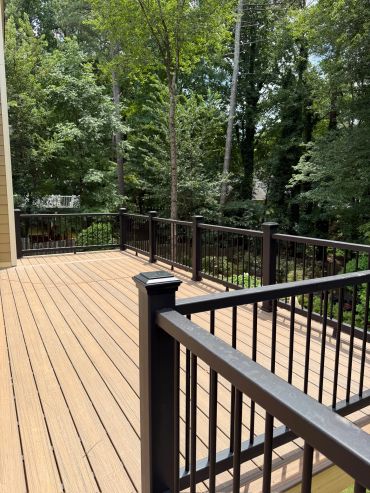
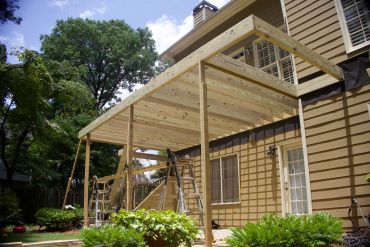
Decking, railings, and stairs went on. The final inspection turned up one item: the small set of steps off the deck needed a minor correction. We fixed it, the inspector came back, and the deck was approved. Permit closed.
Unforeseen circumstance: sprinkler system damage discovered late in the project
Toward the end of the project, the homeowners noticed their sprinkler system was not working and flagged it to us. The likely cause was damage during the footing excavation weeks earlier — a line running through the yard that hadn't surfaced as an issue during digging, unlike the irrigation head near the footings that had already been identified and relocated during pre-construction.
This is another example of a genuinely unforeseen circumstance, and it's worth explaining why. A property survey shows setbacks, property lines, and the dimensions of visible structures — it does not show underground utility or irrigation schematics. Unless a homeowner tells the contractor exactly where sprinkler lines, low-voltage wiring, or other buried lines run, there is no document a contractor can check to know they're there before digging starts.
That's why we ask homeowners to flag any known underground lines near the work area before excavation begins, and why we treat a discovery like this the same way we treat any other unforeseen condition on the job: document it, communicate it promptly, and resolve it in coordination with the homeowner rather than leaving it as a loose end after the crew has moved on.
Takeaway for homeowners: If you know where sprinkler lines, low-voltage lighting, or other utilities run through your yard, tell your contractor before excavation, even if it seems obvious or unrelated to the deck footprint. It's the one piece of information a survey can't give them.
Late July: done, and a neighbor calls
The job wrapped up with a few extras the homeowners added along the way. About a week later, a neighbor a few doors down asked us to quote a replacement for their own deck.
That is the real ending. A permitted, inspected deck on a visible lot in a Marietta neighborhood is its own advertisement.
Before Your Own Marietta Deck Rebuild
PERMITS AND DESIGN DOCUMENTATION: WHAT SUPPORTS THE PROCESS
Every phase above — accurate pricing, a smooth permit review, a framing inspection that passes the first time — depends on the same set of documents being right before construction starts. On a project like this, that means:
- Renderings and structural drawings — the rendering that establishes the design intent and dimensions the homeowner is agreeing to, together with the framing plan, ledger detail, post and footing sizing, and stair/guardrail details that the city reviews for code compliance and that the framing inspector checks the built structure against.
- A detailed scope of work that defines exactly what's included in the base price, so that anything found later (like the rotten wood discussed below) is clearly a discovered condition, not a scope dispute.
When the framing inspection stalled on this job, having structural drawings on file — and a contractor able to revise and resubmit them quickly — was what got the project moving again. Loose or informal plans make that kind of hold-up last much longer.
WHY A PERMITTED DECK STALLS, AND WHAT TO EXPECT
If you take one thing from the timeline above, take this: the permit approval is not the finish line for paperwork. The inspections are where the city actually checks the work, and framing is the inspection most likely to raise a question.
Common reasons a Marietta deck framing inspection gets held up:
- Joist span or beam size doesn't match the tables. Georgia uses the International Residential Code with state amendments. Deck joists and beams have maximum spans based on lumber size, species, and spacing. If a span is a foot over, the inspector will ask.
- Ledger attachment. Bolt spacing, flashing behind the ledger, and the tension ties that keep the deck from pulling away from the house. Inspectors look closely here because ledger failure is how decks collapse.
- Lateral bracing. Larger or elevated decks need diagonal bracing or lateral connectors. This is frequently missing on unpermitted decks and always checked on permitted ones.
- Stair details. Stringer size, riser height consistency, tread depth, handrail height and graspability, and a solid landing at the bottom. Stairs are the most common final-inspection correction, including on our job.
- Guardrail height and baluster spacing. Thirty-six inches minimum, no opening a 4-inch sphere can pass through.
None of these are exotic. A contractor who builds permitted decks regularly designs for them from the start. But field conditions change, plans get revised, and sometimes a reviewer wants to see the arithmetic. Build slack into your expectations.
A realistic timeline for a permitted deck rebuild in Marietta: one to two weeks for permit approval, two to four weeks of construction, and inspections woven through. If a plan question comes up, add one to three weeks. Plan for six to eight weeks from signed contract to closed permit, and be pleasantly surprised if it goes faster.
MATERIALS AND VENDORS
The framing on this rebuild is pressure-treated Southern yellow pine, sized to the structural drawings the city reviewed: 6x6 posts, 4x4 rail posts, and 2x10 joists and beams. For the decking and railing, we build with Trex, one of the most established names in composite decking, known for fade and stain resistance and a range of finishes that don't require the sanding, staining, or board replacement that wood decking eventually needs. You can browse their products through this link: https://www.trex.com/
Structural connections — post caps, joist hangers, and the tension ties that keep a deck from pulling away from the house — are Simpson Strong-Tie hardware, rated for the loads a deck this size carries. Framing lumber and fasteners come through Lowe's (https://www.lowes.com/), our standing supplier for this project type. Alternatively, you can also find most of these items on Home Depot (https://www.homedepot.com/).
If you're researching materials for your own project, these manufacturer sites are a good starting point for seeing what's available before your contractor finalizes a spec.
HOMEOWNER CHECKLIST BEFORE YOUR DECK REBUILD STARTS
- Survey. Confirm your property lines, easements, and setback requirements before design work begins. Keep in mind a survey shows visible structures and dimensions — it does not map underground utility lines.
- Renderings and structural drawings. Get a rendering you can actually react to — dimensions, layout, relationship to the house — and confirm the framing plan, ledger detail, and structural drawings are complete and reviewed internally before submittal to the city.
- Detailed scope of work. Make sure the contract spells out exactly what's included, so anything found later during demolition is clearly a discovered condition, not a gray area.
- Flag any known underground lines. Tell your contractor about sprinkler lines, low-voltage lighting, gas lines, or anything else buried near where footings will go. Surveys don't show this — only you or your utility locate service will know it's there.
- Confirm your jurisdiction. City of Marietta or unincorporated Cobb County. Your contractor should know; if they do not, that is your first question answered.
- Ask who is pulling the permit. It should be the contractor, in the contractor's name.
- Deal with utilities early. Gas lines, irrigation, low-voltage lighting, hose bibs. Get them capped, moved, or marked before demolition.
- Check your HOA. Many Marietta neighborhoods require architectural approval separate from the city permit. Get both.
- Expect the ledger area to be opened up. Ask how rot at the band board will be handled and priced if found.
- Ask how change orders work. The answer you want: documented, priced, and approved by you before extra work proceeds — never added after the fact.
- Know the inspection sequence. Footing, framing, final. Ask your contractor to notify you when each is requested and when it passes.
- Plan to be flexible around inspection days. Inspectors give a day, not a time
REPAIR VS. REBUILD: WHEN DOES A PERMIT KICK IN?
This is the question we get most often, usually phrased as "what if I just replace the boards?"
Under the City of Marietta's rules, a permit is required to construct, enlarge, alter, or repair a structure. In practice:
- Replacing a few deck boards or a railing section with like materials is generally treated as maintenance.
- Replacing all the decking and railings is a gray area. The structure is untouched, but you have effectively rebuilt what people stand on. Call the city and ask; it is a five-minute phone call.
- Touching the structure at all (joists, beams, posts, ledger, footings) is a permit. No exceptions.
- A full tear-out and rebuild, even to the same size, is a permit. New structure means new inspections.
The temptation to skip it is understandable. The reasons not to are practical, not moral. An unpermitted deck can surface during a home sale when a buyer's inspector asks for the permit history. It can create problems with your homeowner's insurance if there is ever an injury on it. And the structural issues that inspectors catch — ledger attachment above all — are the ones that hurt people.
WHAT WE DO DIFFERENTLY BECAUSE OF THIS JOB
Every deck teaches us something. This one changed how we communicate during the permit-to-final window. We now send homeowners a short update on every inspection day: what was requested, what the inspector said, and what happens next, even when the answer is "we're waiting." Silence is what turns a normal delay into a month of worry.
It also reinforced why we lead every project with a survey; renderings, a detailed scope of work, and structural drawings reviewed before submittal — and why any condition discovered mid-project, whether it's an underground utility or rotten framing behind the old ledger, gets documented and approved as a change order before work continues. Planning doesn't prevent every surprise. It's what makes the surprises manageable instead of costly.
The takeaway: A permitted deck rebuild will almost never go exactly according to the original plan — hidden rot, buried utilities, and inspector questions are normal parts of the process, not signs of a bad contractor. What protects the homeowner and the project is detailed planning up front, clear documentation of every discovered condition, and a change-order process that requires approval before extra work proceeds. That's what turns an unpredictable process into a manageable one.
If you are in Marietta and planning a deck rebuild, we would rather you know exactly what the process looks like before you sign anything, with us or anyone else.
See the finished Marietta deck rebuild
What a new deck actually costs in Atlanta
Composite or wood: which survives Georgia humidity
Building outside the City of Marietta? Read Do Atlanta homeowners need a permit to build a deck?
See what a covered porch costs: our East Cobb gable roof porch cost breakdown. Want to know who you would be working with? Read VoyageATL's Hidden Gems interview with Jadon Steavens, our owner.
CHARACTER CRAFTSMEN
Building permitted, inspected decks and porches across Marietta, Cobb County, and Metro Atlanta.
Fee amounts and city procedures referenced above are current as of publication; verify with City of Marietta Development Services before relying on them.
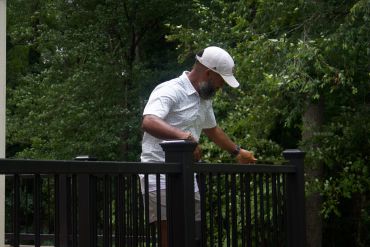
Photos From the Marietta Deck Rebuild
This website uses cookies.
We use cookies to analyze website traffic and optimize your website experience. By accepting our use of cookies, your data will be aggregated with all other user data.